Help / My sticker
Would you like to ship a PICTO Online order directly to your client while remaining discreet about its origin?
We offer you two types of labels for your shipments: Standard Label or Neutral Label.
New: a Custom Label containing your own information can also be activated by you.
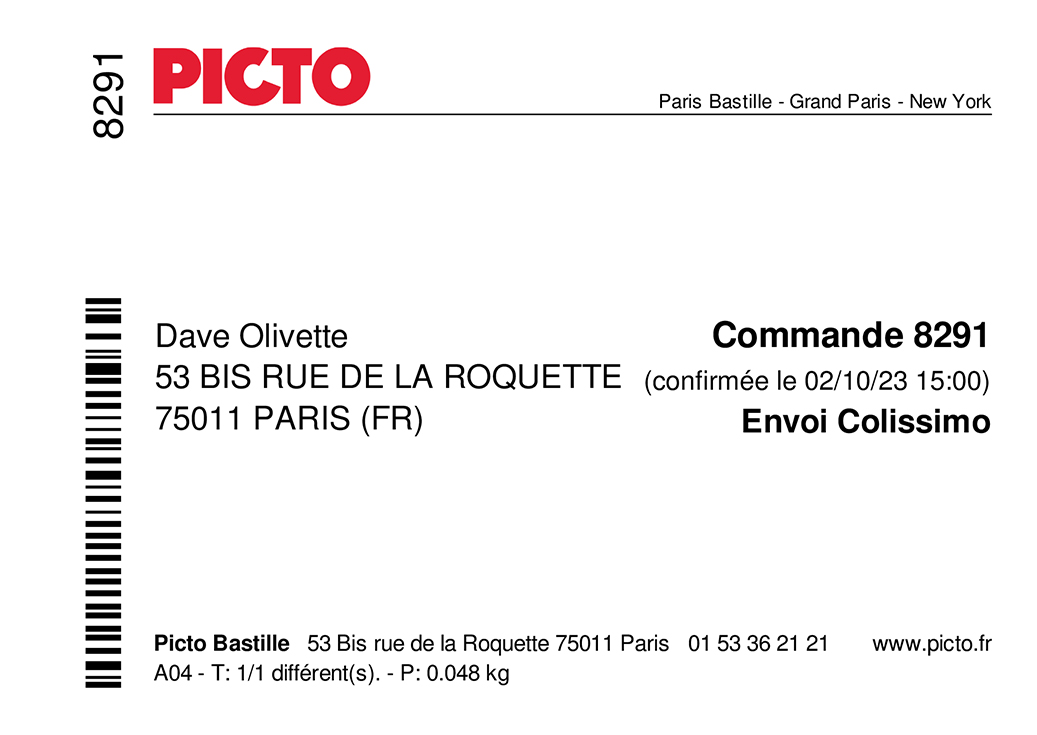 The Standard label is PICTO Online’s default label since its creation; it is enabled by default and displays all the important information about your order. It includes the PICTO logo and the names of our various sites.
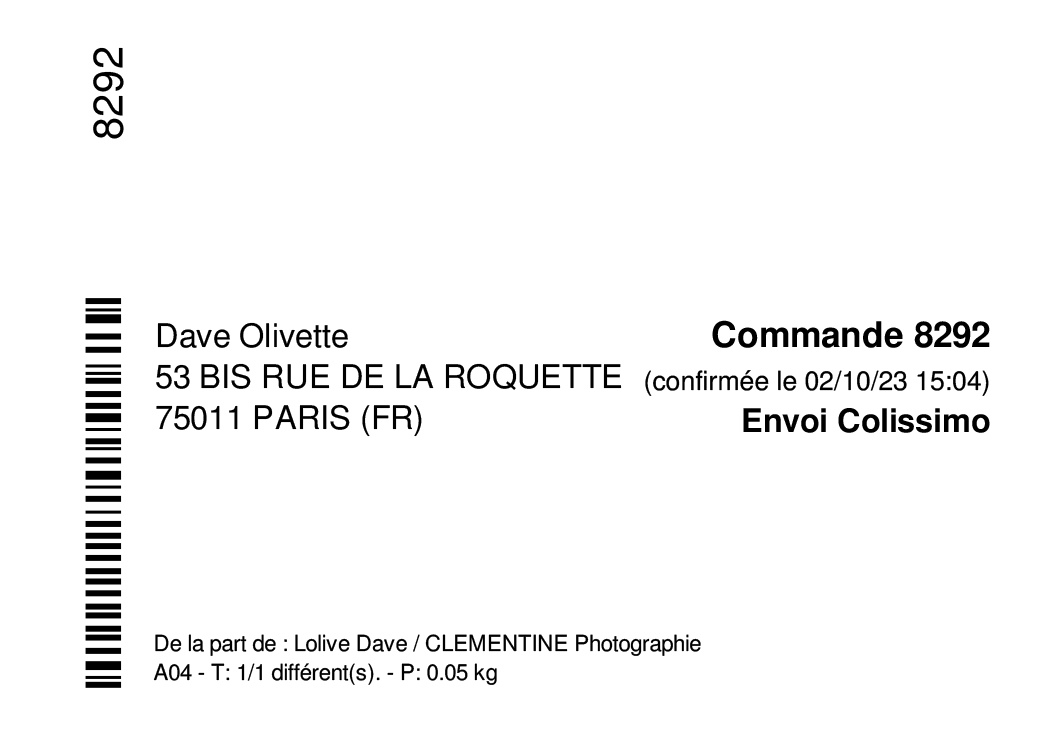 The Neutral label is a free label template that only displays the essential information about your order without any reference to PICTO Lab—no logo and no mention of our sites. A text "From:" automatically displays your first name, last name, and company name.
This allows you to make a direct and discreet shipment to your client.
Label Selection
You can choose your Standard, Neutral, or Custom label at every order in the Pickup or Delivery step.
To save your label choice for all future orders, you can also set your default label in your account:
My Account => My Preferences => My Label.
Pickup
The Neutral or Custom label option is also available if you want to pick up an order yourself and deliver it to your client without needing to create a new label.
- Note:
- - No other information (logo, text) is present on our packaging. Only the standard label includes the PICTO logo and its labs.
- - The PICTO invoice is never included in our packaging to ensure full confidentiality with your client.
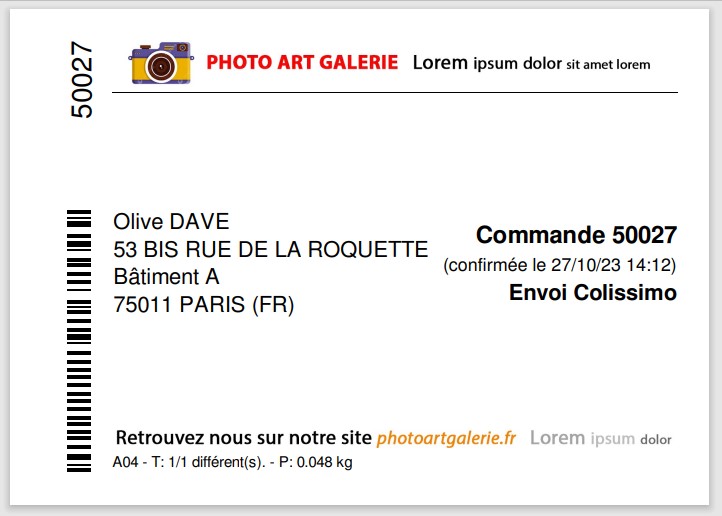
Custom Label
The Custom label follows the same template as the Neutral label (no reference to PICTO Lab) but allows you to insert your information in two separate areas.
The custom label is now freely available and no longer requires activation by us.
To insert your information into the custom label, you first need to prepare an RGB JPEG image file in software like Adobe Photoshop or GIMP for each area, with the following pixel dimensions:
- A header file for area 1 at the top of the label. The RGB image must be exactly 1417 pixels wide x 116 pixels high.
- A footer file for area 2 at the bottom of the label. The RGB image must be exactly 1417 pixels wide x 47 pixels high.
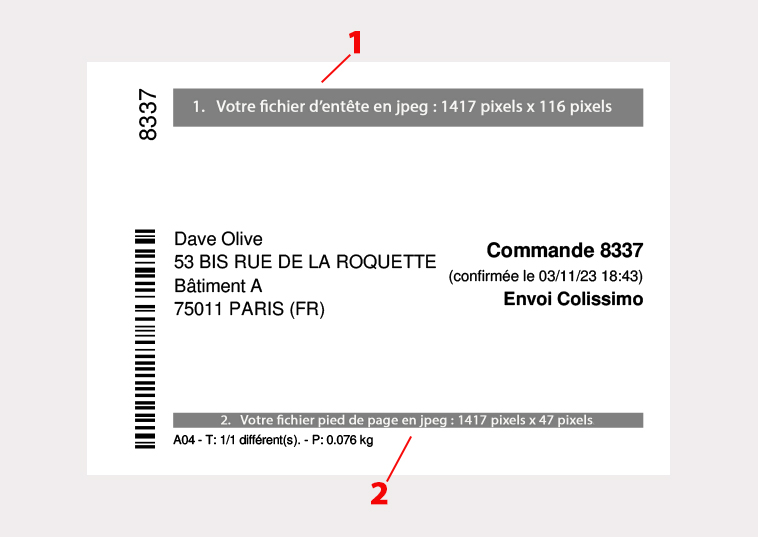
- You are free to design or create the content of these files. The header could include your logo and brand name, while the footer could reference your business (website, shop address, email address, etc.).
- If you prefer not to create these files yourself, we can do it for you upon request. You will need to send us your graphic elements (logo) and associated text. File design may incur a charge.
Create the header file in Adobe Photoshop:
- File => New…
- Width: 1417 pixels
- Height: 116 pixels (for area 1 - header) or 47 pixels (for area 2 - footer)
- Orientation: Horizontal
- Resolution: 72 ppi (Not important since dimensions are in pixels)
- Color mode: RGB Color - 8 Bit
- Background contents: White (or another of your choice)
- Color profile: Adobe RGB 1998
- Pixel aspect ratio: Square pixels
- Click “Create” to get the file corresponding to the information area that will be printed for the label’s header or footer.
- Add your visual elements. For text, you can use font sizes between 8 and 12 points.
- Save as JPG.
Uploading Image Files
From your client account => My Account => My Preferences, in the My Label section, select Custom Label and upload your prepared files for each area:
- A header file for area 1 (top of the label).
- A footer file for area 2 (bottom of the label).
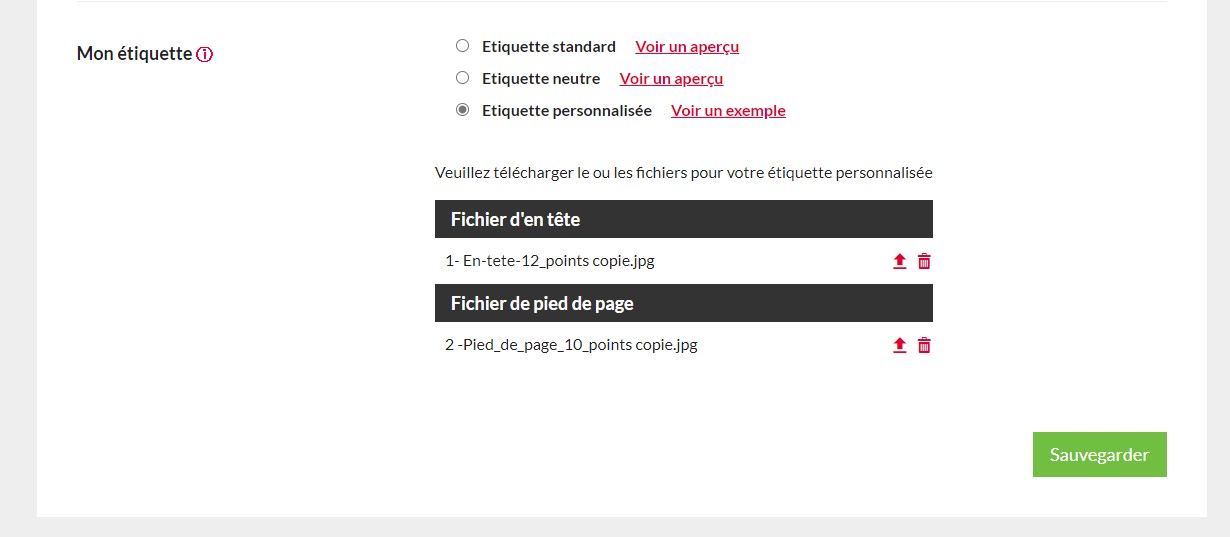
- Click Save. The information from the uploaded files will automatically be printed on your future custom labels.
- If needed, you can download the uploaded files to review their content or delete them.
Note:
- You need at least one file in one area for the custom label to work.
- If both areas are empty, Custom Label will automatically revert to Standard Label. You’ll need to reselect your label choice under My Label.
- If you have an active cart, your new custom label won’t be applied if you finalize that order. For your first order using a custom label, it’s best to set it up with an empty cart before adding your prints to ensure it’s applied correctly.
Check Your Label Selection at the Pickup or Delivery Step
- When preparing an order, at the Pickup or Delivery step, you can check your selected custom label or temporarily switch to another label (Neutral or Standard).
- The image files uploaded in My Label are saved by us and will automatically be applied to every order with a custom label.